Most people know how to set up their email account in Outlook, but might not know all of the features Outlook has to offer. One feature that is helpful for those who are traveling or have a busy week is the out of office assistant. In this blog post, we will show you how to set up your out of office assistant in Outlook and some tips on how to make sure it functions properly. Stay productive while you’re away!
What Is an Out of Office Message
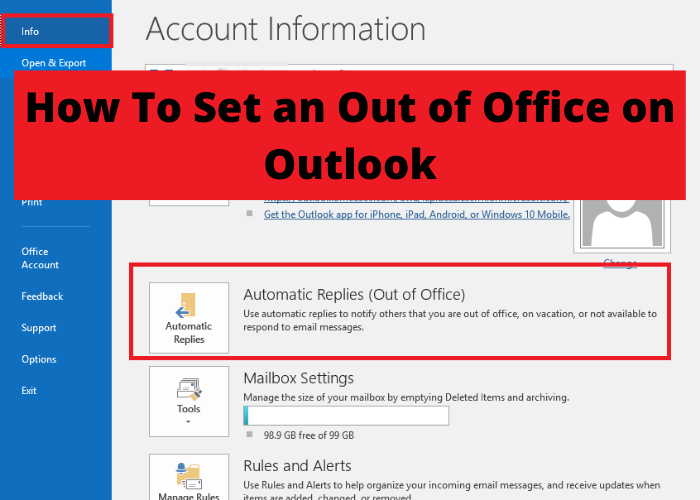
An out of office message is an automated response that is set up in Outlook to let people who send you email know that you are away from your desk. To set up an out of office message, go to the File tab, click Info, and then click Automatic Replies. If you want to turn on automatic replies, select the Send automatic replies check box, and then type the message that you want to send in the Inside My Organization tab. If you want to send different messages to people inside and outside your organization, select the Send replies only during this time period, check the box, and then type the message that you want to send in the Outside My Organization tab. You can also specify the start and end dates for your out of office message. When you are finished, click OK. Your out of office message will now be sent to anyone who emails you while you are away.
Why Would You Want To Set One up on Outlook
As anyone who has ever dealt with a crowded inbox can attest, managing emails can be a daunting task. Fortunately, Microsoft Outlook offers a variety of tools to help users organize and streamline their email communications. One of the most useful features of Outlook is the ability to set up rules. Rules allow users to automatically sort emails based on a number of criteria, such as sender, recipient, subject line, or keywords. This can be an extremely helpful way to keep your inbox organized and reduce the amount of time you spend sorting through messages. In addition, rules can also be used to manage email communications for projects or groups. By creating a rule for all emails related to a particular project, you can ensure that all relevant messages are collected in one place. Whether you are looking to declutter your inbox or better manage group email conversations, setting up rules in Outlook can be a valuable tool.
How To Create an Out of Office Message for Outlook
One of the most important things you can do when you step away from the office for a period of time is to set up an out of office message in Outlook. This will ensure that anyone who tries to contact you will know that you are unavailable and will not expect an immediate response. To set up an out of office message in Outlook, start by opening the program and clicking on the “File” tab. Then, click on “Info” and select “Automatic Replies.” From here, you can choose to send replies only to people in your Contacts list or to anyone who sends you a message. You can also specify how long you will be away and include a custom message. Once you have everything set up, click “OK” to save your changes. Now, whenever someone sends you an email, they will automatically receive your out of office message.
Tips for Setting up Your Out of Office Message on Outlook
One of the most important things you can do when you go on vacation is to set up an out of office message on Outlook. This will let your contacts know that you are away and will not be able to respond to their emails immediately. To set up an out of office message, open Outlook and click on the File tab. Then, click on the Info category and select Automatic Replies. Next, select the Send Automatic Replies checkbox and choose how long you want the message to be active. You can also customize the message that people will receive by clicking on the Customize Message button. When you are finished, click OK to save your changes. With a few simple steps, you can ensure that your out of office message is properly set up and that your contacts will know how to reach you while you are away.